Managing Rules

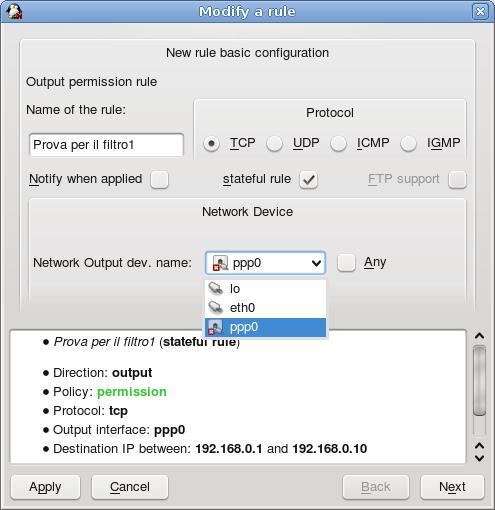
In the first page of the rule adding/modifying wizard you can setup the rule name, the network protocol and device of the rule.
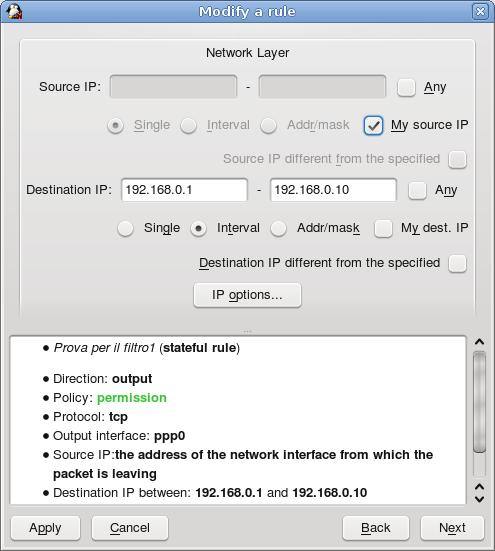
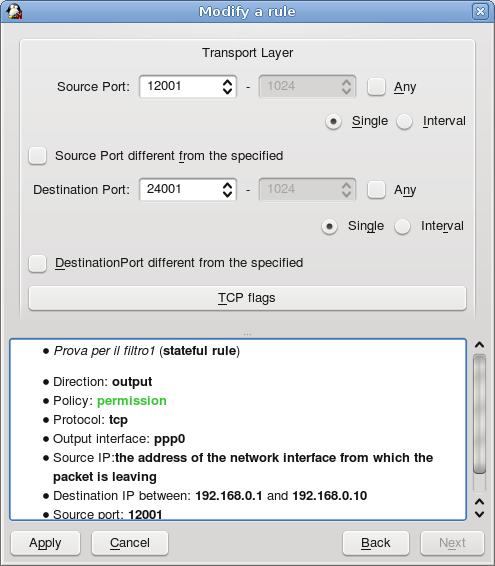
Note that, in the lower part of the dialog, a summary of the rule being created/modified is available. Just modify a field and watch the changes in the lower part. In this way, when you configure the next steps, you can always keep in mind all the settings previously configured in the other phases.

In the second part, called Network Layer one can setup internet addresses which the rule shall match. As you can see, many options are choosable here. In all the configuration widgets, the keyboard input is filtered so that the user is prevented from typing addresses with wrong syntax.

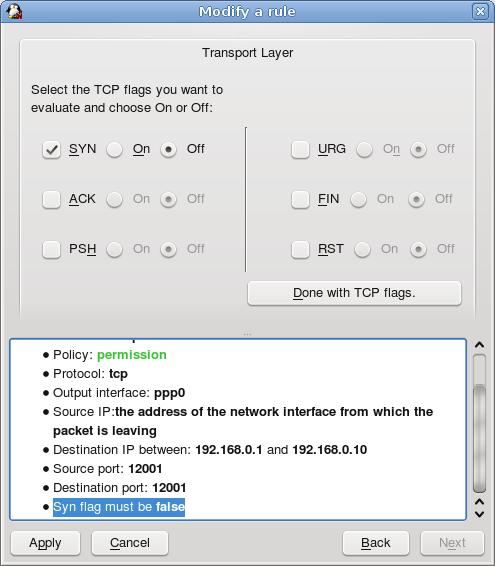
In the third page of the configuration widget, the transport protocol related part is configured. This means port numbers for TCP and UDP protocols, as well as the TCP flags concerning the TCP control protocol (see the image below).

Enable the flag you want to check and then choose if you want it to be on or off to match your rule.
As you can see, the configuration of a new rule, or the modification of an already existing one, is very simple and straightforward interacting with this dialog.
Apply adds the rule on the rule tree, at the first available position after the item you selected in the adding action, while Cancel interrupts and cancels the procedure. With the buttons Previous and Next, you can navigate through the configuration pages of the adder dialog.
Note that while adding or modifying a rule, the main window is disabled and so you are required to complete or cancel the operation before being able to interact with the main window.
Notwithstanding, the help and info right panels are still available and updated during the operations on the adder dialog. So you can keep an eye on them if you need help! If they are not visible, click on the corresponding toolbar icons to activate them.